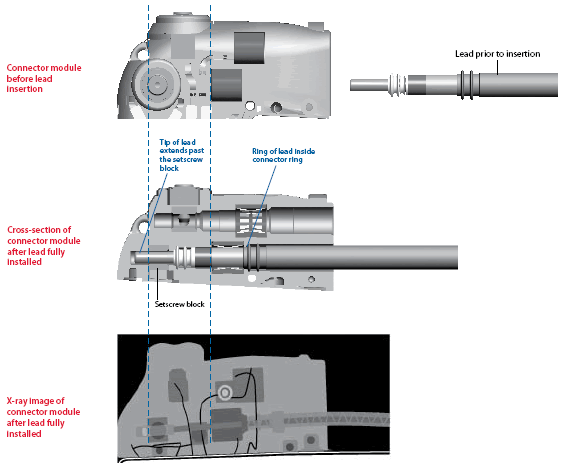
Insertion of the Lead into the Device
View specific models that this applies to
The implantable system consists of a pulse generator and at least one lead. The system operation depends on proper electrical and mechanical operation. With the advent of internationally recognized connector standards, the challenge of ensuring proper mechanical fit between the lead and device connectors has been simplified, although the international connector standard does not address all aspects of the procedure for connecting a lead to the device.
If the lead connector is not fully installed, oversensing may result as described in the connector problems section of the performance note, “Clinical Management of High Voltage Lead System Oversensing.”
Performing the following steps can be used for each lead connection during the implant procedure:
- Insert the torque wrench into the appropriate setscrew. For easier lead insertion, insert the lead closest to the device first.
- Look down the connector port to verify that the port is not obstructed. If the port is obstructed, retract the setscrew to clear the bore. Take care not to disengage the setscrew from the connector block.
- Push the lead into the connector port until the lead pin is clearly visible beyond the setscrew block.
- Hold the lead in position while tightening the setscrew until the torque wrench clicks.
- Tug gently on the lead to confirm a secure fit.

Current publications may provide additional information on implant procedures used by others, e.g., radiographic evaluation of the terminal pin beyond the terminal post.1
1Pickett RA III, Saavedra P, Ali MF, Darbar D, Rottman JN. Implantable cardioverter-defibrillator malfunction due to mechanical failure of the header connection. J Cardiovasc Electrophysiol. September 2004;15(9):1095-1099.

